Hi again,
So in my last post, I left off with a promise to share pictures of some of the pottery things I have made since that Empty Bowls class in college and I plan to come through on that promise!
For a couple months earlier this year (2018) I took lessons in a local, private studio. At first, the aim was for me to re-learn how to center the clay and pull walls. I found out that I had taught myself how to throw with the wheel spinning the traditionally Japanese way, and not the way a right-handed person in the United States would learn. My teacher was a bit of a stickler, and insisted that I learn the ‘correct’ way.
I set to work re-training my body to do what I had spent months on before. Eventually, I got to a satisfactory point in my ability to do the very basics and moved on to a mini project. We decided, given that I had was simultaneously working on publishing my children’s book, that it might be fun for me to do something aimed at kids. And that’s how the child’s tea set idea came about.
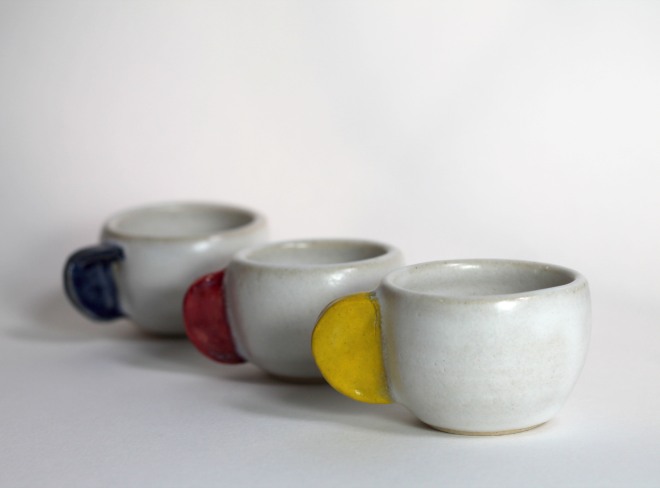
My first goal was to produce cups of a consistent size and shape… which is actually much harder for a beginner than one would think! I loved getting to wedge and weigh the clay, and just to be in the studio in general. (Wedging is a technique for mixing the clay so as to get all of the air pockets out and to ensure consistent moisture levels throughout.) I did get a bit frustrated at time with the throwing, and often felt watched during my lessons. I had grown so accustomed to throwing solitarily, learning from my own mistakes and having the freedom to fail, that I felt increasingly self conscious.
After throwing the body of the cup, I let them to sit covered in plastic for a couple days and would come back to the studio in order to trim. You may have seen videos online of potters trimming… it can be an incredibly mesmerizing and meditative process. (Trimming is where you use tools to remove excess clay, particularly around the base and on the bottom of a pot.)
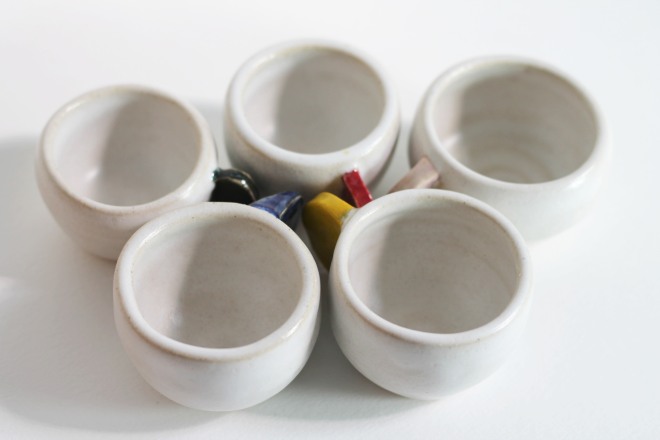
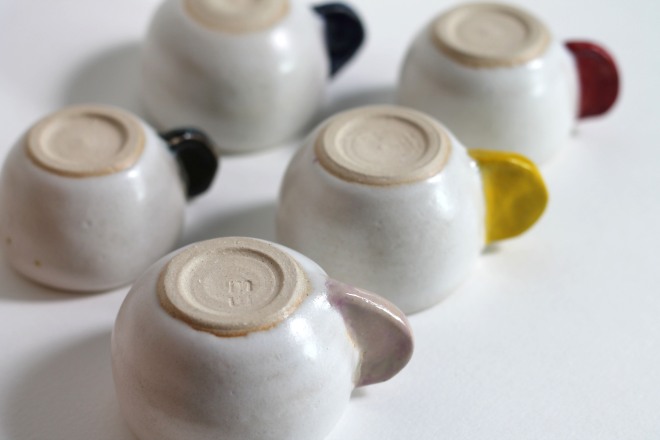
Then, I would roll out slabs of clay to cut out the handles. Again, I found that uniformity is so difficult! Next comes scoring and attaching the handles. (Scoring is basically making little marks/scratches in the clay to provide a rough surface for attaching. It increases the friction, and without it the two smooth surfaces wouldn’t bond very well.)
After this, they are left to dry and harden for many days. Once sufficiently moisture free, they are bisque fired. Then I painted the handles with underglazes, covered them with a clear glaze, and dipped the rest of the cup in that lovely beigey-white. Then, off to the kiln for a final firing and then they were ready to go!

Overall, I am pretty happy with how they came out, though I definitely can spot imperfections aplenty. But that’s one of the things about anything handmade… it’s not perfect. We aren’t machines and while it is certainly good to aspire to make beautiful (and technically ‘correct’) things, it is often the imperfections that make them so beautiful. There is something personal and unique about them that lend to the character.
So there you have it, my experience making a set of tea cups. What do you think? Should I make more the next time I have access to a pottery studio? I certainly think I would like to give it a go!
Thanks for reading!
Much love,
Megan

They’re beautiful. I love that you made them a children’s size tea set in recognition of your other work. Well done and keep going!
LikeLiked by 1 person
Thanks so much!!
Love your blog, by the way 🙂
LikeLiked by 1 person
Oh thank you too 🙂
LikeLiked by 1 person